Quickstart
A quick dive into getting started with Lore
A quick dive into getting started with Lore
In this step we're going to introduce another hook called lore-hook-dialogs-bootstrap that will generate all of our dialogs for us.
You can view the finished code for this step by checking out the
dialogs.5branch of the completed project.
While the dialog we created is now a little simpler, since it no longer needs to include the code to show and dismiss itself, we can still do a lot better.
As mentioned previously, in a real application, you may have dozens of dialogs for creating, updating and deleting content. And these dialogs are often all incredibly similar, which creates a huge amount of boilerplate.
Many applications have (or at least strive for) a sense of visual consistency; there's a certain design aesthetic that governs the way the application looks, and components conform to it.
When applied to dialogs, it means things like the header and footer will often look like same, and even the fields and buttons will be identical. A text field in one dialog will look like a text field in another. A dropdown in one will look like a dropdown in another. Wizards will have the same types of steps. Errors will be displayed similarly.
When taken to an extreme, it means that it's possible to create blueprints for your dialogs, similar to the way Lore creates blueprints for actions and reducers, and using those blueprints allows you to switch from a process of creating dialogs to a process of describing dialogs.
The blueprints Lore uses for actions and reducers are possible because even though all REST APIs are different, they're also all similar. And dialogs (and forms in general) exist in a similar space.
It's worth saying that this next part may feel a whole lot like magic, especially since very little about how it works will be explained. But what's important is this:
More than anything else, Lore is a proof of concept intended to document patterns in application development that seem applicable (and beneficial) to the majority of applications.
What follows in the rest of the this section, as we use lore-hook-dialogs-bootstrap to automatically generate dialogs, is an example of what's possible using those patterns.
While the dialogs created by the hook are fairly flexible, and the hook itself was created for (and is being used in) a production application, the visual appearance and behavior of forms within an application changes frequently as it evolves, and it would be unrealistic to expect this library to solve the unique visual needs of your application.
This library is meant to be demonstrative. It's meant to say: "If you created blueprints for your own dialogs, this is possible. If you like this development flow, if this idea appeals to you, perhaps consider learning how it's done, and creating a version of this for your own application".
With that out of the way, let's get started. Run the following command to install the package:
npm install lore-hook-dialogs-bootstrap --save
Then open index.js and add the hook like this:
// index.js
...
import dialog from 'lore-hook-dialog-bootstrap';
import dialogs from 'lore-hook-dialogs-bootstrap';
...

lore.summon({
  hooks: {
    ...
    dialog,
    dialogs,
    ...
  }
});
Next update the CreateButton to have the hook generate the dialog for us, instead of using the custom dialog we created ourselves previously.
// src/components/CreateButton.js
onClick() {
  lore.dialog.show(function() {
    return lore.dialogs.tweet.create({
      blueprint: 'optimistic',
      request: function(data) {
        return lore.actions.tweet.create(data).payload;
      }
    });
  });
}
The call to lore.dialogs.tweet.create generates (and returns) a dialog for creating tweets, and is one type of dialog offered by the hook; the others, which we'll see later, are update and destroy.
We're also telling the hook what kind of behavior we want the dialog to have, which is what the blueprint represents. The optimistic blueprint will exactly mirror what we created ourselves (the dialog will be dismissed as soon as the action is invoked).
The other types of blueprints (which we won't cover in this Quickstart) are
overlayandwizard, which are actually designed to wait for server confirmation before closing, and will display errors to the user if there were any issues creating the resource (which in this case is our tweet).
With change done, let's try it out. Click the "create tweet" button, you'll see that a dialog launches, but it doesn't have any fields.
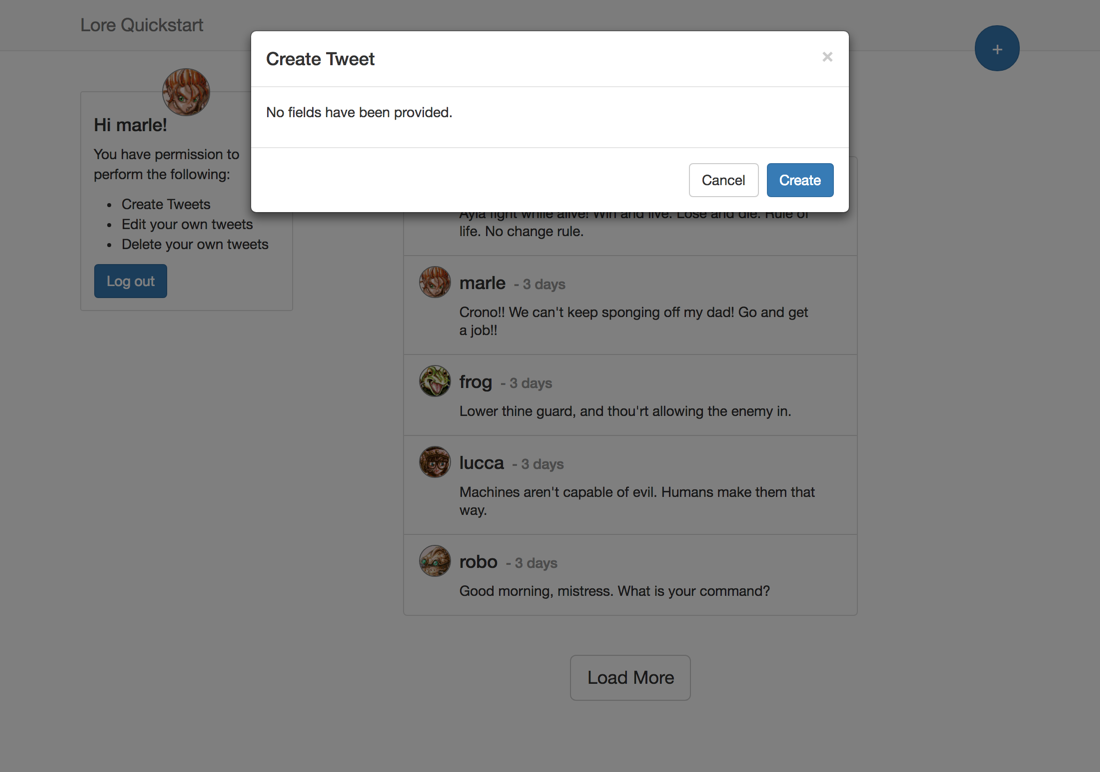
This is because we haven't described what data we need the dialog to collect, only that it exists for the purpose of creating tweets.
To fix this, open the tweet model and add this code:
// src/models/tweet.js
export default {

  dialogs: {
    create: {
      data: {
        text: ''
      },
      validators: {
        text: [function(value) {
          if (!value) {
            return 'This field is required';
          }
        }]
      },
      fields: [
        {
          key: 'text',
          type: 'text',
          props: {
            label: 'Message',
            placeholder: "What's happening?"
          }
        }
      ]
    }
  }

}
In order for the dialog to display fields, it needs to know what those fields should be, and one place it looks for them is in the dialogs property of the associated model.
You can also configure the dialog directly, by passing it a set of arguments. But since this Quickstart is about Lore, and not patterns for building forms, we'll reserve any further discussion about this library for the documentation, or for a separate (future) tutorial focused on forms themselves.
Here we're telling the dialog three things:
The data property describes the initial data for the dialog. In this case, our dialog only has one field, which is text, and we want the initial value for that field set to an empty string.
The validators property provides a set of functions that determine whether the data entered by the user is valid or not, and the form can't be submitted until all data is valid. In this case, we're saying the text field is required.
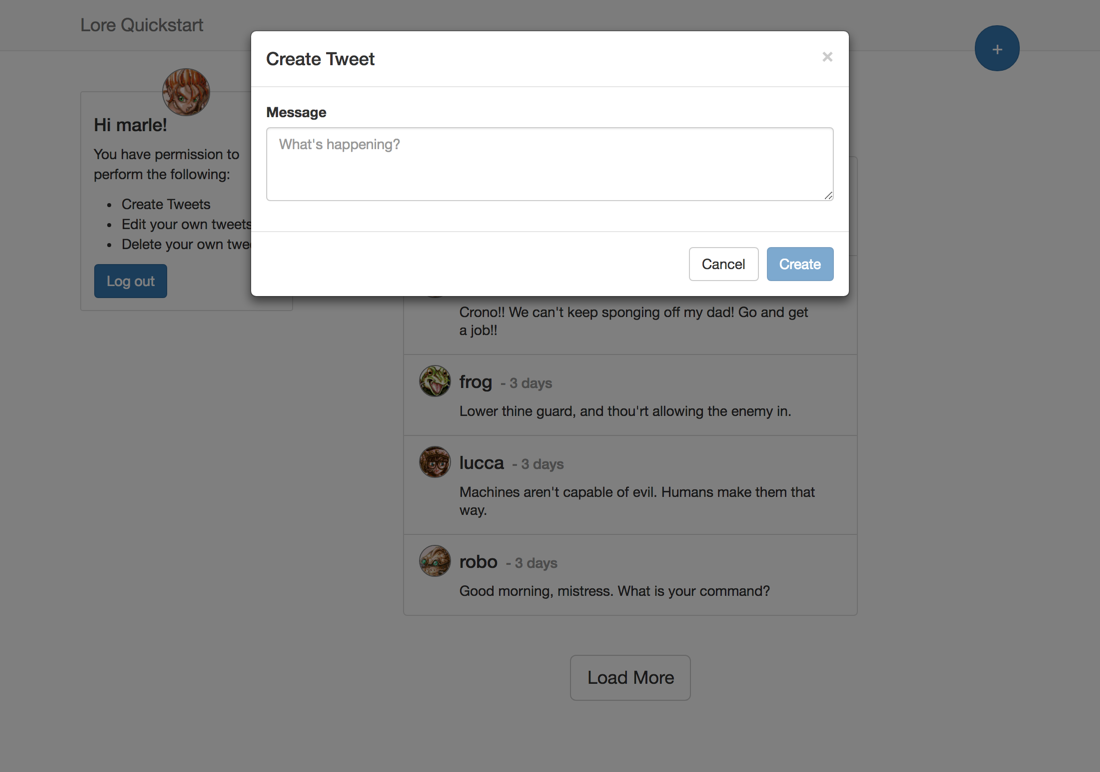
The fields property is an object describing the fields we need displayed. In this case, we have a single field (text) which is of type "text" (a multiline textarea), and it should have the label "Message" with the placeholder text of "What's happening?".
With those changes in place, try it out again, and this time you should see fully functioning form. You can even submit it, and if you refresh the browser, you'll see the tweet you created.
In addition to the
optimisticblueprint (which closes as soon as the dialog is submitted), the hook also supports anoverlayblueprint (which will wait until the resource is saved before closing) as well as awizardblueprint (which will provide a confirmation screen after the resource is saved).If you'd like a better understanding of how these dialogs are generated, and what the underlying patterns are that are used to create the blueprints, check out the Lore Forms Pattern Tutorial.
If everything went well, your application should now look like this.
Below is a list of files modified during this step.
/**
 * This file kicks off the build process for the application.  It also attaches
 * the Lore singleton to the window, so you can access it from the command line
 * in case you need to play with it or want to manually kick off actions or check
 * the reducer state (through `lore.actions.xyz`, `lore.reducers.xyz`,
 * `lore.models.xyz`, etc.)
 */

import lore from 'lore';
import _ from 'lodash';

// Import the styles for the loading screen. We're doing that here to make
// sure they get loaded regardless of the entry point for the application.
import './assets/css/loading-screen.css';

// Allows you to access your lore app globally as well as from within
// the console. Remove this line if you don't want to be able to do that.
window.lore = lore;

// Hooks
import auth from 'lore-hook-auth';
import actions from 'lore-hook-actions';
import bindActions from 'lore-hook-bind-actions';
import collections from 'lore-hook-collections';
import connections from 'lore-hook-connections';
import connect from 'lore-hook-connect';
import dialog from 'lore-hook-dialog-bootstrap';
import dialogs from 'lore-hook-dialogs-bootstrap';
import models from 'lore-hook-models';
import react from 'lore-hook-react';
import reducers from 'lore-hook-reducers';
import redux from 'lore-hook-redux';
import router from 'lore-hook-router';

// Summon the app!
lore.summon({
  hooks: {
    auth,
    actions,
    bindActions,
    collections,
    connections,
    connect,
    dialog,
    dialogs,
    models,
    react,
    reducers,
    redux: _.extend(redux, {
      dependencies: ['reducers', 'auth']
    }),
    router
  }
});
import React from 'react';
import createReactClass from 'create-react-class';
import PropTypes from 'prop-types';

export default createReactClass({
  displayName: 'CreateButton',

  onClick() {
    lore.dialog.show(function() {
      return lore.dialogs.tweet.create({
        blueprint: 'optimistic',
        request: function(data) {
          return lore.actions.tweet.create(data).payload;
        }
      });
    });
  },

  render() {
    return (
      <button
        type="button"
        className="btn btn-primary btn-lg create-button"
        onClick={this.onClick}>
        +
      </button>
    );
  }

});
import React from 'react';
import PropTypes from 'prop-types';

class CreateButton extends React.Component {

  constructor(props) {
    super(props);
    this.onClick = this.onClick.bind(this);
  }

  onClick() {
    lore.dialog.show(function() {
      return lore.dialogs.tweet.create({
        blueprint: 'optimistic',
        request: function(data) {
          return lore.actions.tweet.create(data).payload;
        }
      });
    });
  }

  render () {
    return (
      <button
        type="button"
        className="btn btn-primary btn-lg create-button"
        onClick={this.onClick}>
        +
      </button>
    );
  }

}

export default CreateButton;
export default {

  dialogs: {
    create: {
      data: {
        text: ''
      },
      validators: {
        text: [function(value) {
          if (!value) {
            return 'This field is required';
          }
        }]
      },
      fields: [
        {
          key: 'text',
          type: 'text',
          props: {
            label: 'Message',
            placeholder: "What's happening?"
          }
        }
      ]
    }
  }

}
Next we're going to create a way to edit tweets.