Quickstart
A quick dive into getting started with Lore
A quick dive into getting started with Lore
In this step we're going to learn how to mount dialogs.
You can view the finished code for this step by checking out the
dialogs.2branch of the completed project.
We've seen Lore do a lot of things up to this point, including mounting the application, setting up routing, generating reducers and actions, and orchestrating data fetching for components. But what we haven't talked about is how it does that, because truthfully, the framework itself doesn't have any of that functionality built into it.
Lore itself isn't a framework so much as a plugin engine, and it's all the plugins that combine to make it a framework for building React applications. At it's core, Lore only does two things:
config files are loaded and combinedThese plugins are referred to as hooks, and we're going to be installing some additional hooks throughout this section in order to simplify the process of generating and mounting dialogs.
You can learn more about how to create your own hooks here.
The first hook we'll install is called lore-hook-dialog. Install it by running this command:
npm install lore-hook-dialog --save
Next open index.js and locate the call for lore.summon(...). Here you can see a list of all the hooks the framework includes by default.
// index.js
lore.summon({
  hooks: {
    auth,
    actions,
    bindActions,
    collections,
    connections,
    connect,
    models,
    react,
    reducers,
    redux: _.extend(redux, {
      dependencies: ['reducers', 'auth']
    }),
    router
  }
});
You've already seen some of these hooks in action:
- The
actionshook converts your models into actions- The
reducershook creates reducers for each of your models- The
connecthook provides theconnectdecorator that invokes actions to fetch data if it doesn't exist in the store
To use the hook we just installed, simply add it to the hooks object like this:
// index.js
...
import dialog from 'lore-hook-dialog';
...

lore.summon({
  hooks: {
    ...
    connect,
    dialog,
    models,
    ...
  }
});
The hook we just installed adds a utility for mounting dialogs, and it exposes this utility through the method lore.dialog.show().
To understand what this method does, open the index.html at the root of your project, and find the element in the body with an id of dialog:
<body>
  <div id="loading-screen">
    ...
  </div>
  <div id="root">
    ...
  </div>
  <div id="dialog"></div>
  ...
</body>
After Lore builds your application, it mounts it to the root element. But rendering dialogs inside that element can be problematic, as it allows other components in your application to unintentionally affect the styling and behavior of your dialogs.
Examples where this can show up:
- Classes applies to parent elements affecting the styling of your dialogs
- Parent components cancelling click events in your dialogs.
The dialog element is intended to be used as target for mounting dialogs, in order to avoid those issues, and the lore.dialog.show() method is a helper that renders a React component to that element.
To demonstrate this utility, replace the onClick behavior of our CreateButton component with this code:
// src/components/CreateButton.js
...
  onClick() {
    lore.dialog.show(function() {
      return (
        <h1>Dialog Placeholder</h1>
      );
    });
  },
...
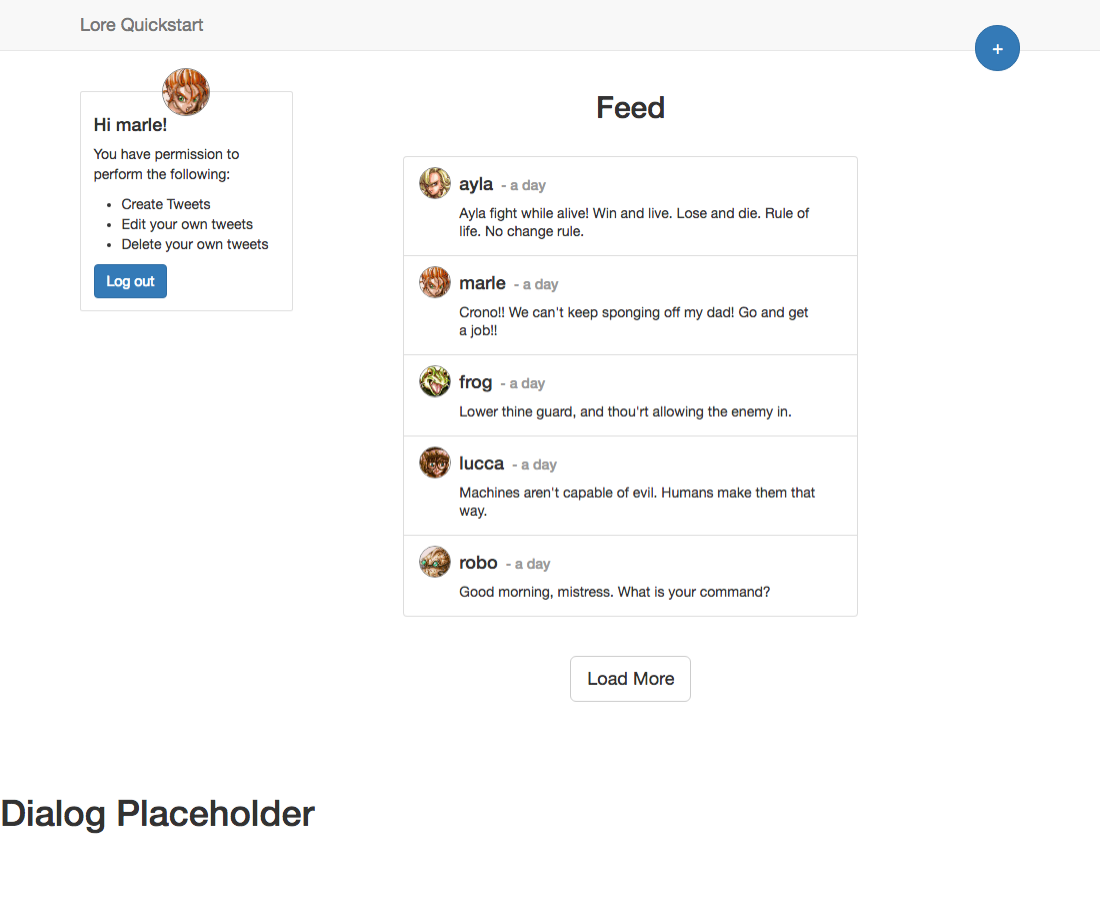
If you refresh the browser and click the button, you should see the text "Dialog Placeholder" appear at the bottom of the screen (you may have to scroll down to see it). You can also inspect the dialog element to confirm the component was mounted inside of it.
In the next section we'll replace this placeholder text with a real dialog.
If everything went well, your application should now look like this.
Below is a list of files modified during this step.
import React from 'react';
import createReactClass from 'create-react-class';
import PropTypes from 'prop-types';

export default createReactClass({
  displayName: 'CreateButton',

  onClick() {
    lore.dialog.show(function() {
      return (
        <h1>Dialog Placeholder</h1>
      );
    });
  },

  render() {
    return (
      <button
        type="button"
        className="btn btn-primary btn-lg create-button"
        onClick={this.onClick}>
        +
      </button>
    );
  }

});
import React from 'react';
import PropTypes from 'prop-types';

class CreateButton extends React.Component {

  constructor(props) {
    super(props);
    this.onClick = this.onClick.bind(this);
  }

  onClick() {
    lore.dialog.show(function() {
      return (
        <h1>Dialog Placeholder</h1>
      );
    });
  }

  render () {
    return (
      <button
        type="button"
        className="btn btn-primary btn-lg create-button"
        onClick={this.onClick}>
        +
      </button>
    );
  }

}

export default CreateButton;
/**
 * This file kicks off the build process for the application.  It also attaches
 * the Lore singleton to the window, so you can access it from the command line
 * in case you need to play with it or want to manually kick off actions or check
 * the reducer state (through `lore.actions.xyz`, `lore.reducers.xyz`,
 * `lore.models.xyz`, etc.)
 */

import lore from 'lore';
import _ from 'lodash';

// Import the styles for the loading screen. We're doing that here to make
// sure they get loaded regardless of the entry point for the application.
import './assets/css/loading-screen.css';

// Allows you to access your lore app globally as well as from within
// the console. Remove this line if you don't want to be able to do that.
window.lore = lore;

// Hooks
import auth from 'lore-hook-auth';
import actions from 'lore-hook-actions';
import bindActions from 'lore-hook-bind-actions';
import collections from 'lore-hook-collections';
import connections from 'lore-hook-connections';
import connect from 'lore-hook-connect';
import dialog from 'lore-hook-dialog';
import models from 'lore-hook-models';
import react from 'lore-hook-react';
import reducers from 'lore-hook-reducers';
import redux from 'lore-hook-redux';
import router from 'lore-hook-router';

// Summon the app!
lore.summon({
  hooks: {
    auth,
    actions,
    bindActions,
    collections,
    connections,
    connect,
    dialog,
    models,
    react,
    reducers,
    redux: _.extend(redux, {
      dependencies: ['reducers', 'auth']
    }),
    router
  }
});
Next we're going to create and mount a dialog.